RPG Playground User Manual
This is the complete documentation on how to create your own Role Playing Game using RPG Playground.
If you just want a quick introduction, take a look at the following YouTube video:
Introduction
What is RPG Playground?
RPG Playground is the easiest way to make your own Action RPG. It runs in your web browser and you can try it at http://rpgplayground.com.
A great story and a lot of imagination is all you need. Programming, graphics and music is provided.
RPG Playground is constantly under development, so new features are added all the time. Take a look at our roadmap to see what is being worked on. You can vote on your favorite features to move them up in priority.
RPG Playground is created by me, Koen Witters. If you have questions or want to propose some new feature, you can reach out at:
Features
The main features of the RPG Playground editor:
- Build your world and indoor scenes
- Add interactive NPC’s, monsters and objects to your world
- Create complex conversations and cut-scenes without coding
Quick overview of the features of your game:
- Play in the web browser, on desktop and mobile
- Control the main hero
- Outdoor and indoor levels
- Talk to NPC’s
- Action RPG combat system
- Inventory items & pickups
- Equipment
What is different about RPG Playground?
In RPG Playground you build your game while you play it. This means you get instant feedback of your changes. Simply open the project panel on the left, and make your changes straight away. There is no real separation between editor and game anymore, you design your game while playing it.
The normal workflow of game maker tools is to start up the editor, edit tilemaps, behaviours, etc, and then generate the game. Once the game is generated, you can test it. If you want to change something, you exit the game and go back to the editor. This kind of workflow can be cumbersome and time consuming.
There are several advantages using our approach:
- You see the impact of your changes immediately in the game
- It’s more fun to work inside your game than inside a boring editor
- No need to search for the resource to adapt, you can just click on it and start editing
- Continue playing where you left off
- No need to compile/build your game before you play it
General concepts
Defining a game
The best way to look at a video game is think of it as a small world. At the base it contains the world itself where all objects live. This world has some rules that all objects must obey.
The objects themselves are divided into static objects that don’t interact, and objects that can interact.
A sandbox game would fit the above description perfectly, but most games also contain more than the game world alone. They guide the player through a fascinating story (or multiple stories). So in that sense, a game could also be thought of as a movie, were the player experiences an adventure going from one situation to the next.
Now what does this all have to do with RPG Playground? Well, when designing your game, it’s important to understand the fundamental concepts of how your game is composed. If you understand the general philosophy behind an RPG Playground game, it’s easier to create your game exactly as you want it.
Namings
RPG Playground borrows a lot of terms from film and theater to describe the different concepts that make up a game.
First of all, a part of the game world is called a level. The interactive objects that live in that world are called actors, and the static objects are called scenery. The map are all the static objects where the actors live.
Level
A level is a small game world that contains:
- A map, such as a tilemap representing grass, dirt, water, … .
- Scenery such as houses, trees, … .
- Several actors, such as the main hero, enemies, … .
A game is composed out of different scenes. Most of the time, only 1 scene is displayed at a time. But it is possible that multiple scenes are shown at the same time. This can be the case when using a game head-up-display for example. The head-up-display or HUD is a different scene, but is shown together with the main level scene.
Map
A map in our context, is the place or world where the actors live. RPG Playground uses a tilemap as map, but you could imagine other maps such as a side-scroller maps or isometric tilemaps.
The map partly defines how actors can move around, what their position is, etc.
Scenery
A map can contain static objects, and these are called scenery. Things such as trees, bridges, houses, etc. are all scenery. They contain no interaction, although they can be animated.
The difference between scenery and actors is that scenery doesn’t interact with the player or with the game world.
Actors
Actors are the interactive part of the game. Examples are the main hero, enemies, animals, etc. . But remark that interactive objects such as doors, treasure chests, moving cars, etc. are also described as actors. They play an interactive role inside our game, and are therefore called actors.
The Project Panel
Now that you know the basic components of an RPG Playground game, let’s see how we can work with it in practice.
When your game is running, on the top-left there is an open project panel button. When clicking it, the project panel will open on the left side of the screen. Close this dialog and resume your game by pressing the close project panel button on the top-right.
The project panel contains the following tabs:
- Scenery: add and remove scenery such as trees, buildings, tables, etc. to your level
- Actors: add and remove game characters and monsters
- Project tree: overview of your complete game, data and resources
- Settings: settings of the currently selected actor, level, …
Menu button
Maximise RPG Playground over your entire screen. Not available in games yet.
Actors Tab
Tokens Component
You can clear all tokens received by the hero by pressing the restart button on the right of the Tokens component title.
Tokens are set using screenplays, see hero receives token “token” for more details.
Screenplay Actions
When designing your game, you will need to add specific game functionality. For example when you open a treasure chest, step on a trap, or when you bump into a character. You want to be able to have conversations, receives items, etc. When a new scene starts, you might want to show a cut-scene that reveals a part of the story. In any case, all of these things can be created with screenplays.
Screenplays are currently specified in plain text. But don’t worry, it is much easier than any programming or scripting language. And when you click the “Add action” on the screenplay window, you just have to click things to get started.
Take a look at the example screenplay below for an example:
hero says "Hi mom!"
mom says "Hello sweetheart. Are you going into the forest?"
hero says "Yes"
mom says "Be careful, alright?"
if hero lacks token "dagger"
    mom says "Take this dagger just in case."
    hero receives token "dagger"
dad says "And be home before supper!"
It reads just like a film script doesn’t it? Well, that’s the whole purpose, to keep it simple and readable so anyone can work with it.
Actions
A screenplay consists of a sequence of actions. An action is always of the form <actor> action, where <actor> is an actor that supports the given action.
Here is the list of simple actions that can be used inside a screenplay:
- character says “your text”
- hero receives token “<token>”
- hero loses token “<token>”
- if hero has token “<token>”
- if hero lacks token “<token>”
- hero teleports to door “<doorName>” at “<levelName>”
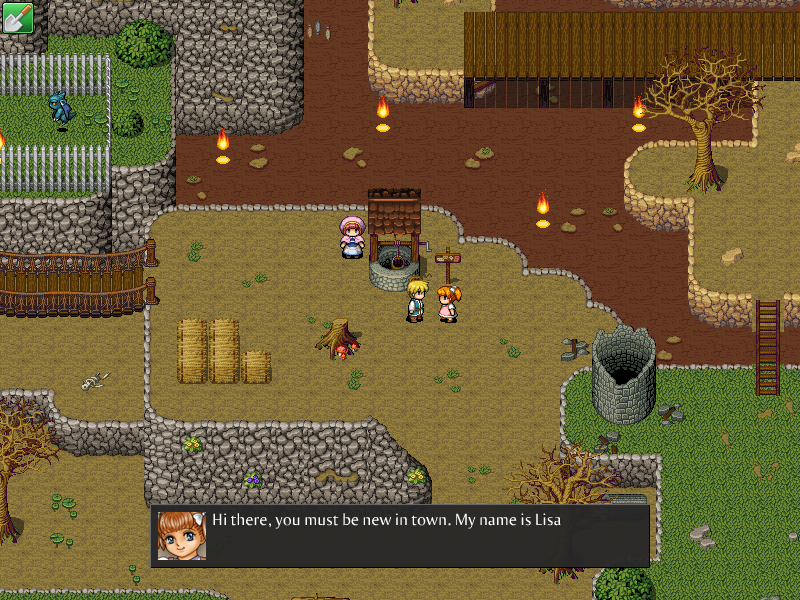
character says “your text“
This action opens a conversation dialog displaying your text. See the example below
Vision Statement
Our Vision
RPG Playground is fun and easy to make the game of your dreams, and share it with the world.
I wish that one of my users will create the next game hit, and do this without any prior knowledge or experience on how to create games.
RPG Playground needs to be both super user friendly, and powerful. This is not an easy combination, because the more things you can to with a product, the harder it is for you to understand and start using it right away.
But there is a way that RPG Playground is able to combine the two, and this is by using multiple abstraction layers. If you are a new user, you start working in the top layer, and don’t need to know anything about those lower layers. And when you gain more experience, you can work your way through the lower layers, and are able to customize everything inside your game.
How?
- Start with a game genre, where everything is already provided.
- No programming. If you can read, you can add and change functionality.
- You edit the game while playing it, making it extra fun.
- Our community is supportive and helps you bring your vision to life.
Our first product will focus on creating 2D RPG games, and is called RPG Playground. But ultimately the goal is that you can create any game you want.
User profiles
Game designer
You design levels, add characters to it, and add cutscenes, dialogues, etc. You work with scenes, stages, scenery and actors. Define new functionality with actions.
Gameplay scripter
You can define new actors and add or remove behaviors. You can even script new behaviors for actors. Add or change any functionality you want. Maybe some day also including editor functionality.
Artist
You draw your own tiles, characters and objects, even with animations. and can import them as a resource into your game. Or you compose your own music and use that for the game. Edit with external tools, import into RPG Playground library.